Sample Can Loading
Powder Sample Cans
There are several standard powder cans. The most commmon used cans on ARCS are made of Al 6061. The following table summarizes the standard cans.
| Can label | Diameter | 1mm annulus | 2mm annulus |
|---|---|---|---|
| 27 mm | 0.25 in | N | N |
| 27 mm | 0.375 in | N | N |
| 27 mm | 0.5 in | N | N |
| 27 mm | 0.625 in | Y | Y |
| Foil Seal | 1.25 in | Y | Y |
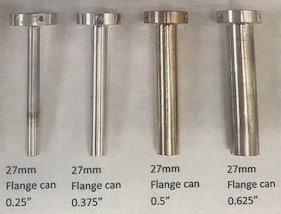
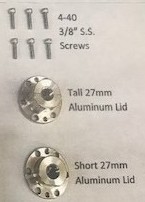
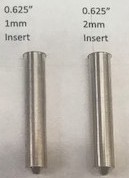
Note there two typical styles of Cans the “27mm” named for the 27mm diameter lid and the “Al foil seal” named for the type of seal used. Pictures of the types of cans are shown in Figures 1 and 2, respectively
 |
 |
|---|---|
 |
|
| Figure 1. Pictures of can parts for the various 27mm cans |
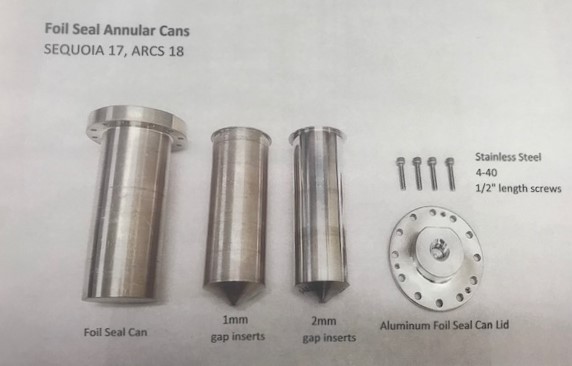
Figure 2. Pictures of Can Parts for the Foil Seal Cans
The Al foil sealed cans are only for annular samples, some of the 27mm cans can use inserts for annular samples. For the smaller diameter 27mm cans, the benefit of making an annulus is negated by the additional Al. The inserts for the annular samples have a cone to help with filling as shown in Figures 1 and 2. The cone should be placed in the can before filling with the tip pointing up.
If your experiment will go above room T the can should not be sealed.
Loading and Sealing cans
For samples that will go to the lowest temperatures, sealing in a bit of He exchange gas will help ensure the sample is at the same temperature as the cryostat. Follow the following procedure for sealing cans :
- First be sure to understand the Hazards of your sample.
- Be sure to wear the appropriate gloves to protect your hands from the materials you are working with.
-
Don all other required PPE for your lab space
- If you are using a can with an annular insert, it should be placed into the can with the cone shape upwards.
The 27mm cans have a groove in the top of the can for sealing with 0.040 inch diameter indium wire.
-
unwind enough indium from the spool to completely cover the ring with some extra.
-
coat the indium with Vaccuum grease by putting some on and then wiping of the extra.
(The Vaccuum grease will help hold the Indium in place while working with the can and will help to remove the Indium for cleaning the can.1 ) -
Overlap a bit of the Indium so it looks like Figure 3
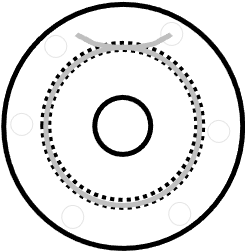
Figure 3 Diagram of putting Indium in a groove for sealing.
- cutoff the extra indium so the overlapping tails are small, but still there as shown in Figure 4.
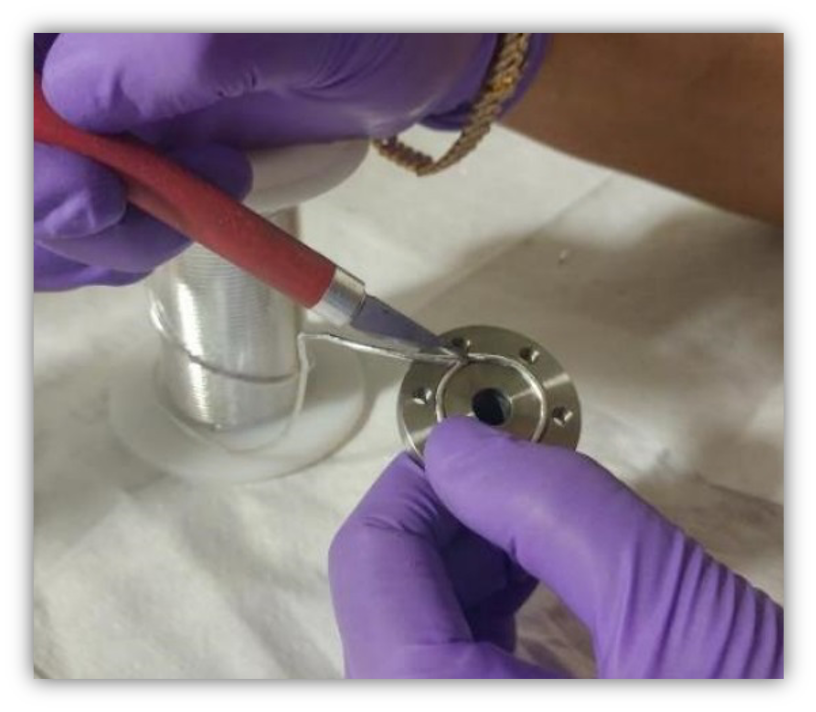
Figure 4 Trimming the Indium
-
Pressing the overlap slightly with a spatula will help make a good seal and hold the Indium in place.
-
Pour the sample into the can using a funnel and something to hold the can. For the 27mm cans a test tube holder works well. Both the test tube holder and a funnel are shown in Figure 5
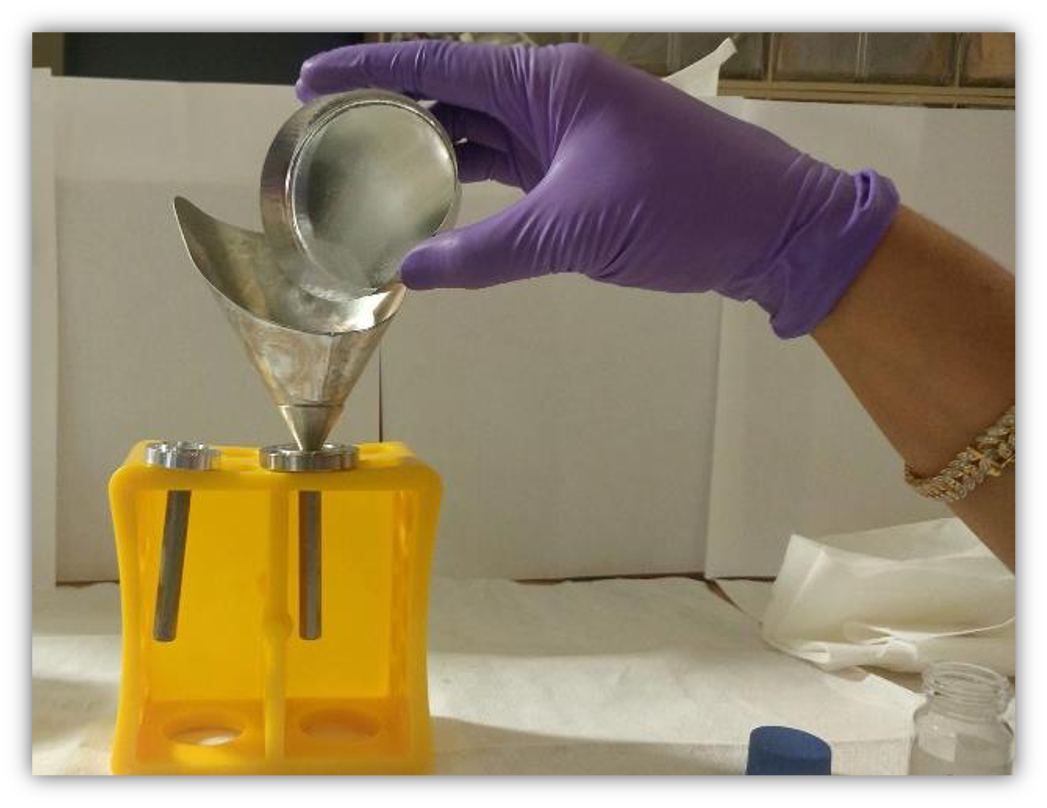
Figure 5 Picture illustrating using a funnel to load sample and using a test tube stand to support the can.
-
Only for the Al foil can. Cut a small piece of foil and lay it across the top of the can.
-
Move the sample can into a He Glove Box for sealing.
(A He Glove bag can be used as well assuming it is flushed sufficiently to be sure air and moisture do not get in the can.) -
Place the lid on the can ensuring that the sealing material is in place. and
-
Tighten the screws down in a uniform manner to compress the indium or foil seal. An allen key is used to tighten down the lid. There are two common ways of tightening down a lid uniformly. One is to use a “star pattern” going around the can multiple times until the screws are tight. This is recommended for the 27mm cans as they only have 6 screws. An example of a star pattern is shown in Figure 6.
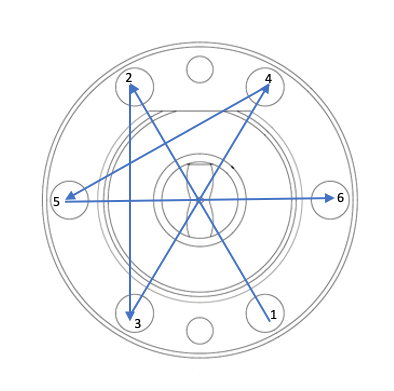
Figure 6 A star Pattern for uniformly tightening screws on an Al can.
The other method is to tighten down each screw part way and then go to the successive screw. If using this method tighten until only a little resitance is observed before going onto the next screw. You will have to go around the can several times.
To make this process easier:
- put the screws in the lid before placing them in the glove box.
- Use an electric screw driver with the appopriate bit until the screw heads contact the can lid. Then switch to a manual key.
References
